



Nobody starts a business because they wanted to make Reels.
But here is what actually happens now: someone hears about your company, and within about ten seconds they are looking at your Instagram account. Not your website. Not your pitch deck. Your social media grid.
That grid is doing a job whether you tend to it or not. It is the proof that you are real, still operating, and trusted by other people. Done well, it is the cheapest community you will ever build.
We also know it is painful to keep up. The blank caption box. The Sunday night scramble. Posting something that is “cringe” because posting nothing felt worse. Wondering if any of it worked.

This is a guide to finally teach you to use AI to help with the manual part.
Step One: Connect Socials to Claude with Planoly
Two things to get in place before anything else. Connect your socials to Planoly (with a free account), and then add the Planoly Claude connector to start publishing posts.
1. Link your socials to Planoly
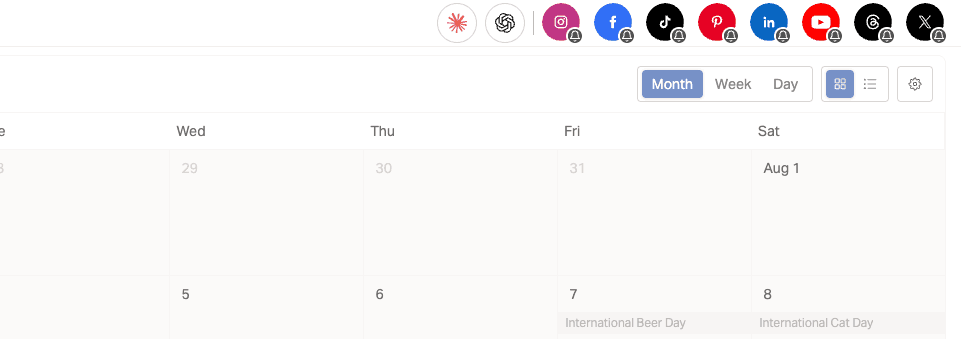
Make sure you have a Planoly account, and make sure that account has at least one of your social channels set up. To get the most value out of this, set it up with an Instagram account which is a business account (and you will need to hook that up with Facebook as well).
2. Add the Planoly Claude connector
Alternatively, you can connect it in Settings
- Open Claude and go to Settings, then Connectors.
- Search for Planoly in the connector directory.
- Click Connect. A Planoly login window opens. If you do not already have a Planoly account, you will be prompted to create one.
- Log in and click Allow. Claude never sees your password, and it only ever acts inside your own workspace.
- Test it. Start a new chat and ask: Using Planoly, list my connected channels. If you get your channel list back, you are done.
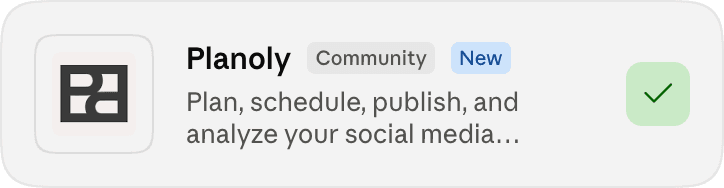
That is a one-time setup. Planoly is now available in every conversation you have with Claude.
What is a connector?
You will see the word connector (or its technical name, MCP) everywhere, and it sounds far more complicated than it is. A connector is simply permission for Claude to go somewhere and do something on your behalf.
Think of it as a road. Without one, Claude can talk about your social media beautifully but cannot see a single post, touch your calendar or update your captions. Switch the Planoly connector on and it can read your channels, see how your posts performed, write captions into your media library, build posts, and put them on the schedule. Traffic runs both ways: it goes out, does the work, and comes back with the results. It is a gamechanger.
Three levels of using AI to manage your socials
Do these in order. Each level assumes the one before it, and skipping straight to the fun stuff is exactly why most people end up with AI content that reads like a robot doing an impression of a human.
| Level | What you do | What you get back |
|---|---|---|
| 1. Beginner 15 minutes | Set up Claude Cowork with your brand info, and run a few early time savers. | Content that sounds like you, and real improvements. |
| 2. Intermediate 25 minutes | Hand over raw media and let Claude help build and schedule real social media posts. | A week of posts on the calendar in a fraction of the time it took before. |
| 3. Advanced 1+ hour | Add other connectors, build and install Claude skills, set up scheduled tasks, become a superhero. | A workflow that runs whether or not you show up to start it. |
Level 1 · 15 minutes
Beginner: give Claude a memory
Right now Claude knows nothing about you and has nowhere to keep anything. Everything in this level is about getting things situated so you can be in a good place.
1. Switch from Chat to Cowork
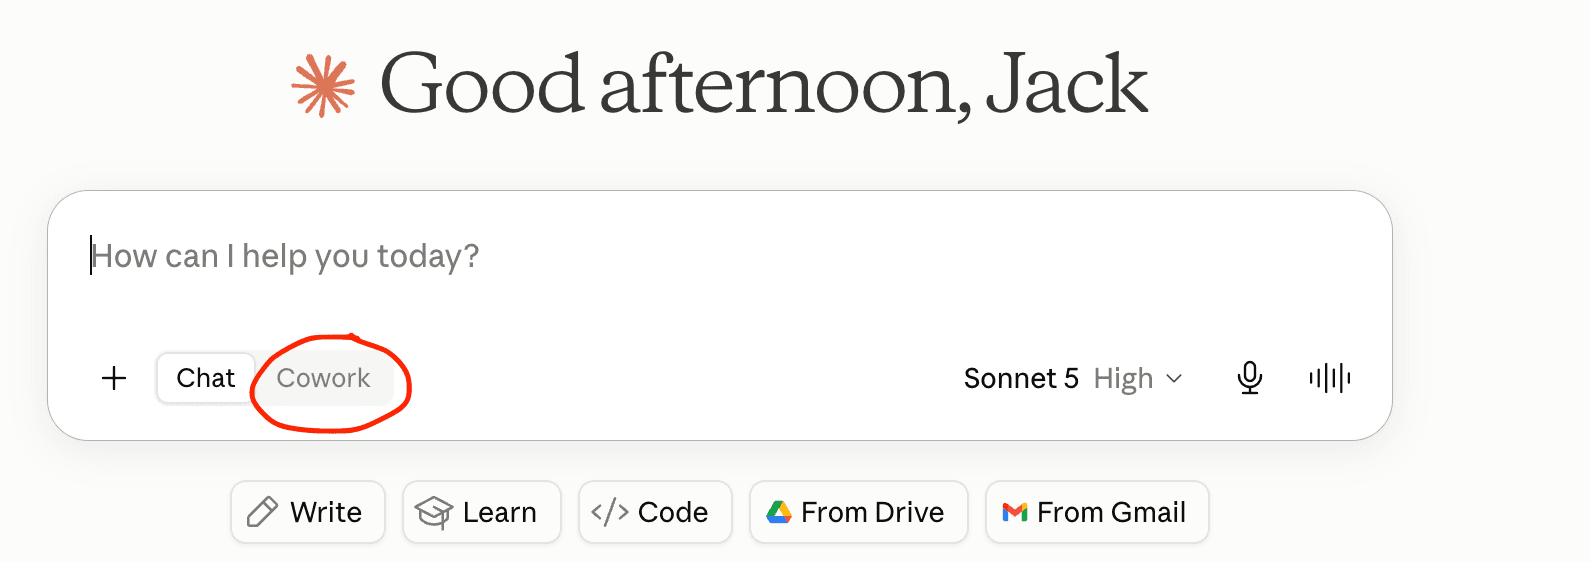
Open the Claude desktop app, find the message box, and switch the mode picker to Cowork. This mode will be your new homebase.
Chat is for asking questions and getting answers back. Cowork is where Claude can work with your files and use your connectors to actually do things on your behalf. It now becomes your “agent” (ie it has agency to take actions). Everything below assumes you are in Cowork.
2. Create a project and give it a folder
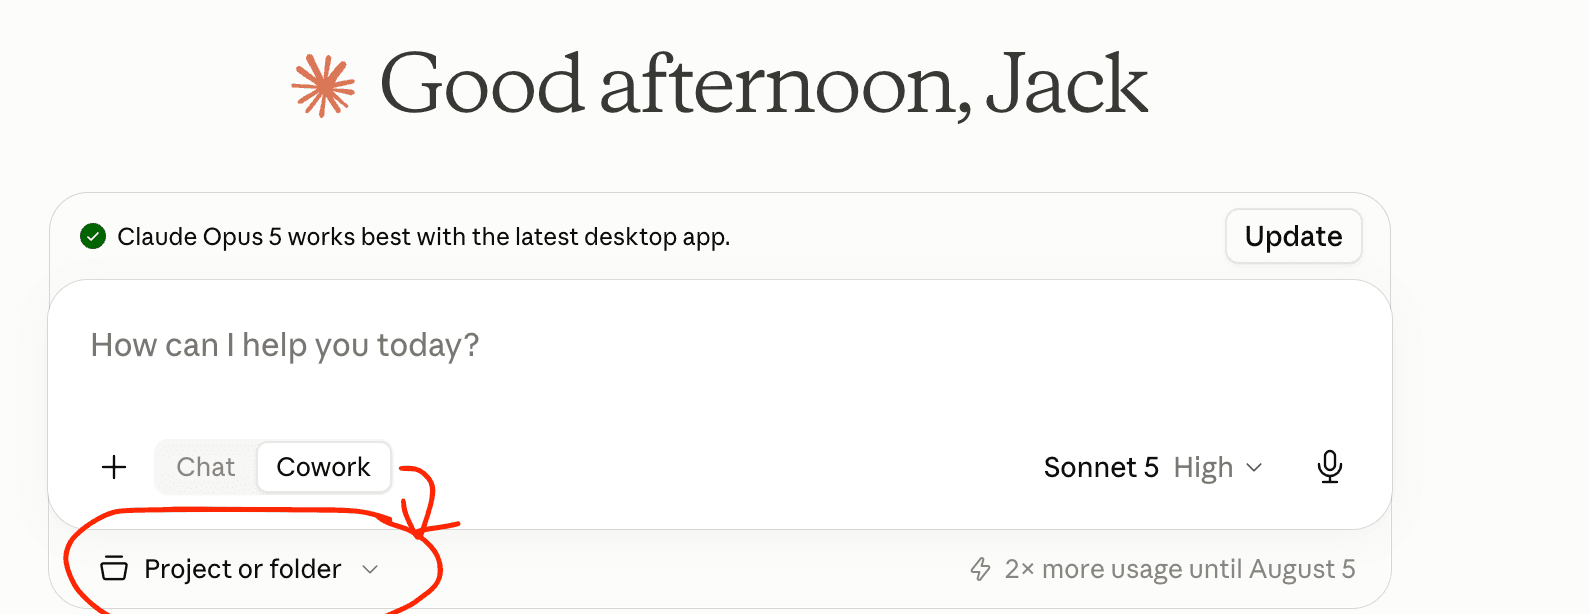
Click Project or Folder, click Create new project, then click Use a folder.
Choose a folder which is designated for your Claude business work. We suggest a fresh one, something like Claude + [Your Business]. Do not point it at your whole desktop or your entire documents folder. This folder is both the boundary of what Claude can see and where your finished work gets saved, so keep it deliberate and small.
Name the project the same thing, and click create.
3. Get Claude to interview you about your brand
Takes five minutes, then you are done with it forever.
This is the step almost everyone skips, and then wonders why their AI captions sound generic. Claude needs a written memory of your brand: who you are, how you talk, what you sound like when you are being funny, your colors and fonts. That file lives in your project and gets read every time.
One thing to clarify: you do not need to write this file from scratch. That is archaic and manual.
Instead, paste the prompt below into Cowork and Claude will interview you conversationally for five to ten minutes, then write the file for you. Use the microphone button and just talk, it is faster and the answers come out sounding much more like you. It may also ask you to drop some relevant files into your new project folder. The more the better. Logos, writing samples, marketing materials. Chuck it all in there.
You are a brand strategist. Interview me, then write a `brand.md` file into
this project's folder - a cheat sheet about my brand that you'll read every
time you write a caption, plan content, or design something for me.

Assume I have never heard of a `brand.md` file and don't know what's supposed
to go in one. Don't explain the format to me. Just ask good questions and
handle the file part yourself.

HOW TO RUN THIS:
- Ask one question at a time. Wait for my answer before moving on.
- Talk like a smart friend, not a brand consultant with a deck. No jargon,
  ever. Don't say "brand architecture," "tone attributes," or "value
  proposition."
- If I give a thin answer or seem stuck, offer 3-4 concrete options to react
  to instead of asking me to think harder.
- Ask short follow-ups when something's vague, but don't interrogate me.
  Aim for 10-15 minutes total.
- Assume I don't know my hex codes or font names. That's normal. You'll work
  those out.
- If my brand doesn't have good examples for a question, mention that I can
  give aspirational examples from other brands to model around.

OPEN LIKE THIS - short, then straight into the first question:
"I'm going to ask you about 9 quick questions about your brand, then turn
your answers into a reference file I'll use every time I make something for
you. No prep needed - if you don't know an answer, say so and we'll figure
it out. And if talking is easier than typing, hit the microphone icon and
just answer out loud. Sound good? First one:"

Mention the microphone once, here, and then never again. If I do answer by
voice, expect rambling and run-on sentences - pull the substance out and
don't treat the messiness as my writing style.

Then ask question 1. Do not front-load a request for files or links.

OFFERING THE SHORTCUT:
Each question below has a "show me instead" option. Bring it up inside the
flow, only when it would actually help - when I hesitate, say "I don't know,"
give a vague answer, or when the thing I'm describing is visual. Phrase it as
the easier path, not homework: "Easier way to answer this one - if you drop
your logo in this folder, I can pull the exact colors out myself. Or just
describe them, whatever's faster."

Make it clear I can drop a file in the project folder, paste text straight
into the chat, or send a link. Never ask for more than one thing at a time.

IF I OFFER A LINK AND YOU CAN'T BROWSE:
Say so plainly, once, and give me an out: "I can read your site directly if
you've got the Claude for Chrome extension set up - takes a minute.
Otherwise a screenshot works just as well. Your call." If I say skip it,
drop the subject entirely.

THE 9 QUESTIONS:
1. THE BASICS - What's the brand called, what do you actually do or sell,
   and who's behind it?
   Show me instead: your About page, your bio, or a link to your shop.

2. WHO IT'S FOR - Who are you talking to? Get specific: what stage of life
   or business they're in, what they're struggling with, what they want.
   Ask how they talk.
   Show me instead: screenshots of your comments or DMs.

3. THE FEELING - If the brand walked into a room, what's the vibe? Push for
   3-5 adjectives, then ask what someone should feel after seeing a post.
   Offer examples if I stall: warm and homey / clean and editorial / loud
   and funny / calm and premium / scrappy and honest.
   Show me instead: a mood board, a Pinterest link, or 3-4 images.

4. HOW YOU SOUND - Ask me to paste in 3-5 things I've written: captions, a
   newsletter, an email to a customer, even a long text. Lead with this
   rather than asking me to describe my own voice, because almost nobody can
   do that well. Then analyze the samples yourself and play the patterns
   back: sentence length, punctuation habits, emoji use, capitalization, how
   I open and close, words I lean on. Ask me to confirm or correct you.

5. THE LOOK - Colors and fonts. Ask for my logo or a screenshot first, then
   pull the values out and show me what you found: "your main color reads as
   a soft terracotta, #C8735A - look right?" Then ask about photo style:
   bright and airy, moody, phone snapshots, product flat lays, faces or no
   faces.

6. WHAT YOU POST ABOUT - The 3-5 recurring themes or content buckets.
   Show me instead: screenshots of my last 9-12 posts, and propose the
   themes back to me from what you see.

7. THE HARD NOS - Words, phrases, topics, aesthetics, or trends that are
   off-brand. Ask what makes me cringe when other accounts do it.

8. THE PRACTICAL STUFF - Products or offers with pricing if relevant, links,
   handles, hashtags, standard CTAs, and which platforms I post on.
   Show me instead: a screenshot of my link-in-bio or pricing page.

9. WHO ELSE IS OUT THERE - 2-3 accounts or brands I admire, and one thing
   that makes me different from everyone else in my space.

Whenever I hand you a file, work with it and tell me what you found before
moving on. Never accept a file silently.

BEFORE YOU WRITE ANYTHING:
Play back a short summary of what you heard and ask if anything's off. Fix
it first.

THEN WRITE `brand.md` INTO THIS PROJECT'S FOLDER WITH THESE SECTIONS:
- Snapshot - 3-4 sentences. Who this brand is and who it serves.
- What we offer - Products, services, pricing, links.
- Audience - Who they are, what they want, what they're worried about, how
  they talk.
- Personality - The adjectives, the feeling, the vibe in a sentence.
- Voice & tone - Concrete rules, not adjectives. Sentence length, emoji
  policy, capitalization, humor level, formality. Include 2-3 real example
  lines that sound right and 2-3 that sound wrong.
- Visual identity - Colors with hex codes and what each is used for. Fonts
  with usage. Photo and graphic style. Flag anything you inferred rather
  than confirmed.
- Content pillars - Each with a one-line description and an example.
- Do's and don'ts - Including a banned words and phrases list.
- Handles, links & CTAs - Everything you'd need to publish a post without
  asking me anything.
- Gaps to fill in - Anything I couldn't answer or you guessed at, plus the
  specific file or link that would close each gap.

Write it so a stranger could read it and produce content that sounds like me.
Specific beats polished - "never uses exclamation points, ends captions with
a question" is worth more than "friendly and engaging tone."

When it's saved, tell me in plain language what's in it, flag anything you
guessed at, and tell me how to update it later.

Ready? Ask me question 1.
You can update this file any time your brand shifts. Just tell Claude what changed and ask it to rewrite brand.md.
Now that you are set up, let us try two things in Claude that will immediately make you a better social media account manager than 90% of the rest.
4. Write and upload the captions for your upcoming posts
If you upload any images or videos to your Planoly media library without captions, or with captions you are not happy with, you do not need to redo them by hand. Ask Claude to go through your entire media library and write captions using the voice from your brand file. Review the captions you like, tell Claude what feels off, and it will adjust. This is a major timesaver!
Using the Planoly connector, write captions for my upcoming posts in my
brand voice.

BEFORE YOU WRITE ANYTHING
- Read brand.md in this project folder. That file is the source of truth for
  voice, tone, banned words, emoji policy, capitalisation and CTAs. If it is
  not there, stop and tell me, because captions written without it will
  sound generic.
- If social-audit.md exists in this folder, read it too and lean on the hook
  and caption patterns that actually performed.
- List my scheduled and draft posts in Planoly for the next 14 days. Show me
  what you found as a simple list - date, channel, format, whether it
  already has a caption - and ask me to confirm the set before you write.

FOR EACH POST
- Look at the actual image or video. Write about what is genuinely in it.
  Never write a caption that would work for any photo.
- Give me two options with different angles, not two rewrites of the same
  sentence. Label them A and B and add one line on why each might work.
- Match the caption length to what my audit says works for that format. If
  there is no audit, keep feed captions to 2-4 short paragraphs and Reels
  captions to one or two lines.
- Open with a hook that earns the second line. No "Happy Monday!" openers,
  no rhetorical questions unless my brand file says I do that.
- End with one CTA from my brand file. One, not three.
- Hashtags: 3-5 relevant and specific ones, placed at the end. No 30-tag
  blocks, no generic tags like #love or #instagood.
- Add alt text for every image.
- For TikTok, give me a separate short title as well as the caption.
- Flag anything you are unsure about rather than inventing it. If a post
  needs a price, a date, a link or a product name you do not have, put
  [NEED: ...] in the caption and list those at the end.

THEN
- Show me everything in one table before touching Planoly: date, channel,
  chosen caption, hashtags, alt text.
- Wait for my approval. When I have picked, update the captions on those
  posts in Planoly and confirm which ones you changed.
- Do not publish anything, and do not change the schedule times. Captions
  only.
5. Audit what has actually worked
Find out which of your posts have performed best over the past 60 days, why, and what Claude would suggest you make more of. Paste the prompt below into a Cowork session in your project and read the results. Run this before you work on your next batch of content, so you are building on evidence instead of a hunch.
Using the Planoly connector, run a performance audit of my social accounts
and write the results to a file called social-audit.md in this project folder.

STEP 1 - GET THE DATA
- List all of my connected channels in Planoly.
- For each channel, pull every post published in the last 60 days along with
  its performance metrics (reach, impressions, likes, comments, saves,
  shares, follows, video views and watch time where available).
- Tell me the date range and post count you actually retrieved before you
  analyse anything, so I know what this is based on. If a channel has fewer
  than 5 posts in the window, say so and widen to 90 days for that channel.

STEP 2 - RANK AND ANALYSE
- Rank posts by engagement rate against reach, not by raw likes. Raw likes
  just tell me which posts the algorithm happened to push.
- Show me my top 10 and my bottom 5.
- For each of the top 10, note: the format (single image, carousel, Reel,
  story), the hook or opening line, the topic, the caption length, the CTA,
  the day and time it went out, and how it did against my 60-day median.
- Then find the patterns across those 10. Do not list every observation.
  Give me the 3-5 that actually repeat, and tell me how confident you are in
  each one given the sample size. Say "this is a weak signal" when it is.
- Do the same for the bottom 5. What do my worst posts have in common?

STEP 3 - CHECK IT AGAINST MY BRAND
- Read brand.md in this folder. Where do my best-performing posts line up
  with the voice and pillars in that file, and where do they contradict it?
  If my audience clearly rewards something my brand file says not to do,
  flag that as a decision for me to make rather than quietly picking a side.

STEP 4 - TELL ME WHAT TO DO NEXT
- 5 specific post ideas for the next two weeks, each one tied to a pattern
  you found. For each: the format, the exact opening line, what the post
  covers, and the CTA.
- 3 things to stop doing, with the evidence.
- Best days and times to post based on my own data, not general best
  practice. If my data is too thin to call it, say so.

RULES
- Use real numbers from Planoly throughout. Never estimate or fill in a
  metric that was not returned.
- Write like you are talking to me, not presenting to a board. No jargon.
- Do not publish, schedule, edit or delete anything. This is read-only.
Re-run this monthly. The patterns move as your audience grows.
Level 2 · 25 minutes
Intermediate: save hours, not minutes
The foundation has been set, and you have a living breathing Claude Cowork project which knows your brand. You have done a few tricks in a Cowork session with your social media accounts. Let us dive in.
Build a 30-day content calendar for your brand
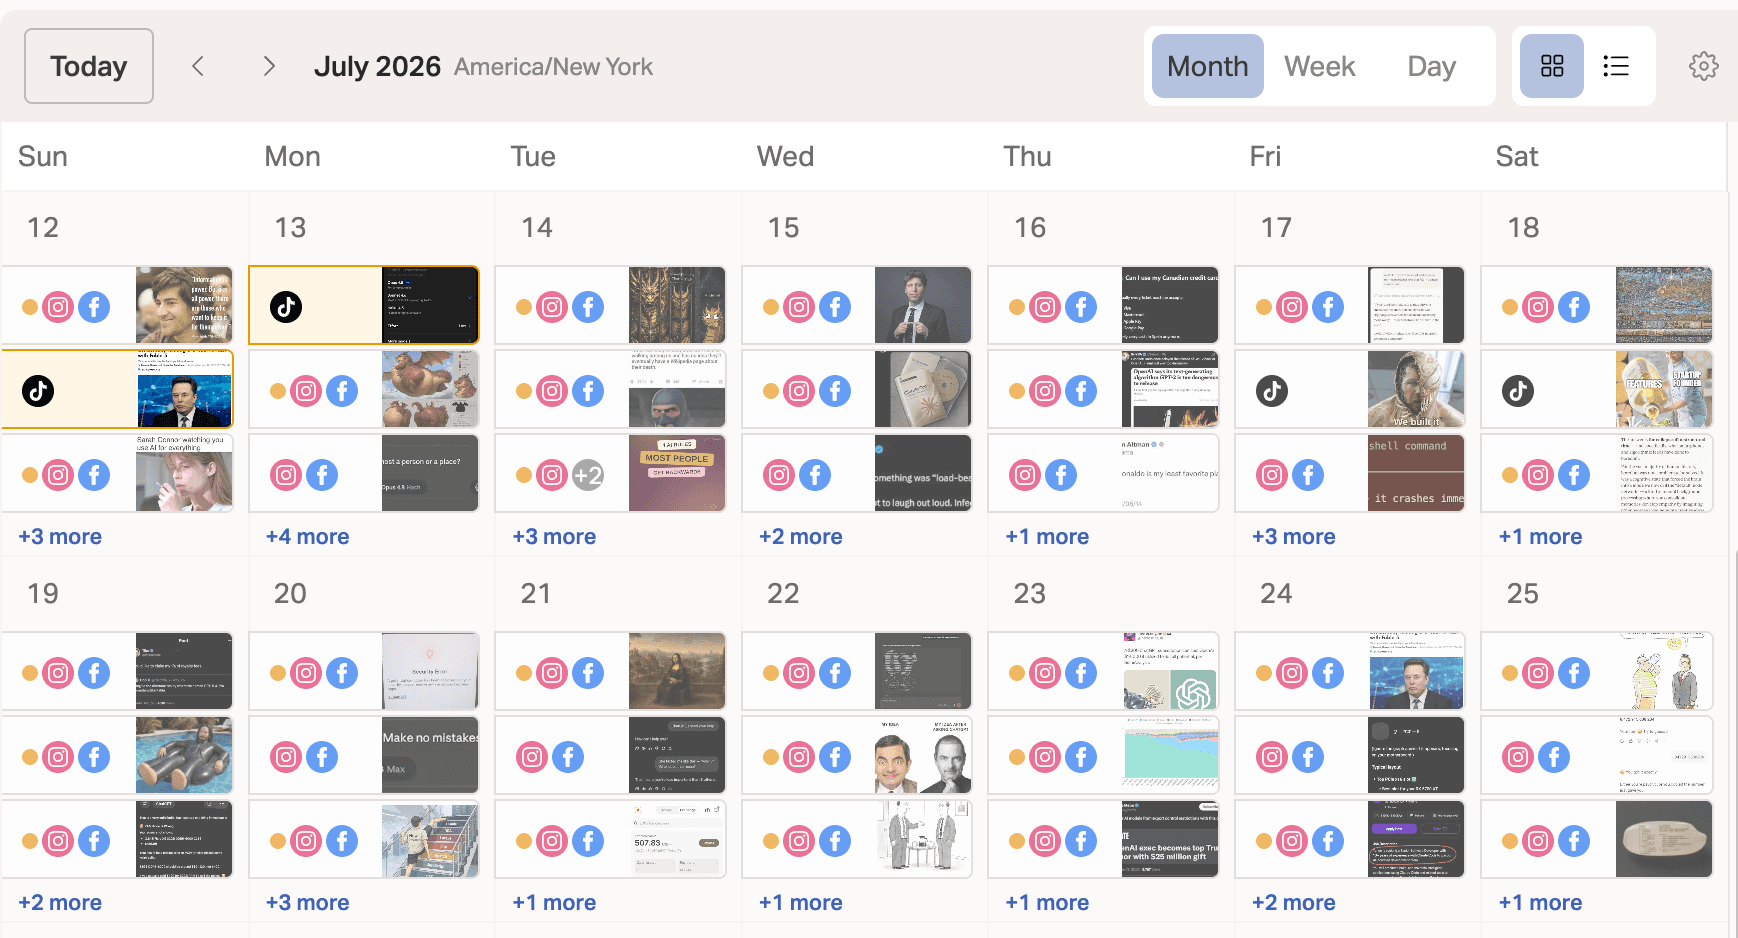
Most content calendars are guesses. “This Friday I will post about a trend I am seeing” or “Monday I will post about a gig I did last week.” Inconsistency kills 99% of socials. It is tough to keep up with new ideas and motivation, and this is exactly the kind of idea generation AI is good at.
Ask Claude to look at your performance to date, your brand files, and 3-5 successful public Instagram accounts in your niche, and put together a suggested 30-day calendar you can then go and execute with your own specific story.
Paste the prompt below into your Cowork session, answer the questions, and work together on it. Once it is done, Claude will hand you the calendar as a file, and it can also add placeholders to your Planoly calendar for you to fill in later.
Build me a research-backed 30-day content calendar and save it to this
project folder as a spreadsheet.

STEP 1 - LEARN MY BRAND AND MY NUMBERS
- Read brand.md in this folder for voice, pillars, audience and CTAs. If it
  is missing, stop and tell me.
- Read social-audit.md if it exists.
- Using the Planoly connector, pull my last 90 days of posts and their
  performance so the plan is built on my own data.

STEP 2 - LOOK AT WHAT IS WORKING FOR OTHERS
- Ask me for 3-5 public Instagram accounts in my niche that I admire or
  compete with. If I do not have any in mind, suggest some based on my brand
  file and let me pick.
- For each account, use the Planoly connector to research their recent posts
  and pull out: the formats they lean on, the hook styles that repeat, their
  posting frequency, and any recurring series or franchise they run.
- Bring back what you found in plain language before you plan anything. I
  want to see the reasoning, not just the output.

STEP 3 - AGREE THE SHAPE BEFORE BUILDING
Ask me these, one at a time:
- How many posts per week can I realistically make?
- Which channels are we planning for?
- Anything fixed I need to work around - a launch, an event, a holiday, a
  trip, a promo?
- Anything I am sick of posting?
Then propose 2-3 whole directions for the month with the trade-offs of each,
and let me choose. Do not build until I pick one.

STEP 4 - BUILD IT
For every single post give me:
- Date and day of week
- Channel and format (single image, carousel, Reel, story)
- Which content pillar it serves
- The specific idea, in one sentence. Not "share a tip" - the actual tip.
- The exact opening line or hook, written out
- What the rest of the post covers, in 2-3 bullets. For carousels, a
  slide-by-slide outline.
- The exact CTA
- What I need to shoot or gather to make it

Mix the formats. Do not give me 30 carousels. Build in at least one
repeatable series I can run weekly, because a franchise is easier to keep up
than 30 original ideas. Sequence it so the month builds rather than jumping
around at random.

STEP 5 - SHOW ME WEEK 1 FIRST
Show me week 1 in the chat and ask if the direction is right before you write
the other three weeks. If I want changes, change them and re-check.

STEP 6 - DELIVER
- Save the full calendar as an .xlsx in this project folder.
- Then ask me whether I want placeholder posts created on my Planoly
  calendar for these dates. Only if I say yes, create them as unpublished
  drafts with the hook and CTA in the caption field, and confirm what you
  created.
- Never publish anything.
There is also a ready-made Content Calendar Builder skill that does all of this. See Level 3.
Turn raw media on your computer into scheduled posts
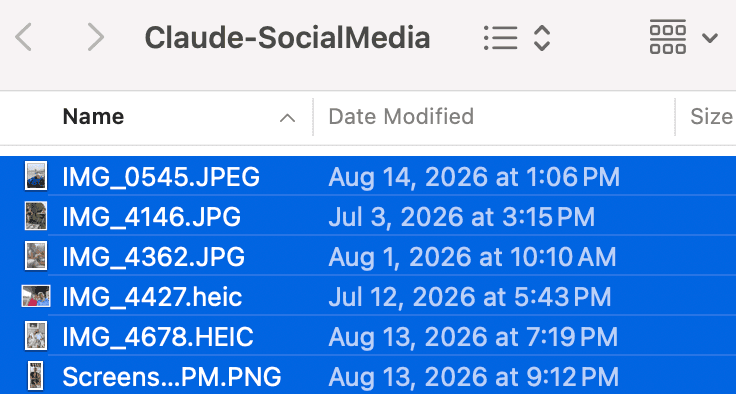
You almost certainly have a folder of usable content already: photos from an event, screen recordings, product shots, memes you saved. That is a week of posts sitting there doing nothing, because turning it into posts is tedious.
Put the files in your Claude folder, ideally in their own subfolder, and reference your planned content calendar. Claude will look at the images, write captions in your voice for each one, decide what belongs as a grid post versus a Reel versus a carousel, upload them to your Planoly media library, and schedule them across the days and times you asked for.
Claude will tell you before it schedules. Nothing goes out without your say.
Turn the media in [FOLDER NAME] into scheduled posts on my Planoly calendar.

STEP 0 - CHECK THAT YOU CAN ACTUALLY UPLOAD IMAGES

Before anything else, confirm you are able to send images to Planoly.

Planoly stores photos and video on Amazon S3, so ask Planoly for an upload link and try sending a small test file to it.

- If it goes through, say so in one line and continue to Step 1.
- If it is refused or blocked, STOP. Do not work around it, do not ask me to upload files by hand, and do not skip ahead. Show me this and wait:

  "I can't upload images to Planoly right now. A setting on your account is blocking the storage Planoly uses for photos and video.

  Quick fix, about 30 seconds:
  1. Open Settings, then Network access, where your allowed domains are listed.
  2. Add this exactly as written, star and dot included:
     *.amazonaws.com
  3. Save it, then come back and tell me it's done.

  One thing to watch: typing just amazonaws.com without the star at the front will not work. The star is what lets it cover the specific storage address Planoly uses."

- Once I confirm, retry the upload test once, then continue.

STEP 1 - LOOK AT WHAT I GAVE YOU

- Open every file in that folder and actually look at it. List back what you see: file name, what is in it, whether it is photo or video, orientation, and rough quality.
- Flag anything unusable - blurry, wrong aspect ratio, too short, duplicated - and tell me why rather than quietly skipping it.
- Group the files that belong together into carousels, and say why you grouped them that way.

STEP 2 - LOAD MY CONTEXT

- Read brand.md in this folder for voice, pillars and CTAs.
- Read my content calendar file in this folder if there is one, and map these assets onto the slots already planned. Tell me which planned posts these files can fill and which ones still need something shot.
- Using the Planoly connector, check what is already on my calendar so you do not double-book a slot or post twice in one day.

STEP 3 - PROPOSE THE PLAN BEFORE DOING ANYTHING

Give me one table covering every proposed post:
- File or files used
- Channel
- Format, with your reasoning: single image, carousel or Reel
- Proposed date and time, using the best times from my own performance data
- The caption, written in my brand voice, with the hook written out in full
- Hashtags (3-5, specific) and alt text
- For Reels, a suggested on-screen hook and a sound direction

Then stop and wait. Do not upload anything yet.

STEP 4 - ONLY AFTER I APPROVE

- Upload the approved media to my Planoly media library.
- Create the posts and set them on the schedule at the agreed times.
- Create them as DRAFTS unless I have explicitly said to schedule them.
- Confirm back exactly what you created: channel, date, time, and a link or ID for each one.

RULES

- Never publish immediately. Never overwrite an existing scheduled post.
- If you are unsure whether something is on-brand, ask instead of deciding.
- Leave the original files in my folder untouched.
- If uploads fail at any later point, treat it as the Step 0 problem and show me those same directions rather than finding a workaround.
Replace [FOLDER NAME] with the subfolder you dropped the files into.
Level 3 · 1+ hour
Advanced: make it run itself
Everything so far still needed you to start it. This level is about turning the work you have proven into something repeatable, then taking your hands off the wheel.
Stack your connectors
Up to now you have used one connector. The people getting the most out of AI are running four or five at once, and that is the point where it stops feeling like a chatbot and starts feeling like a team.
Here is what that looks like as one sentence typed into Cowork:
Pull this week’s campaign brief out of Notion, grab the six product shots from my Canva folder, drop them into my carousel template, write the captions in my voice, and schedule the whole thing in Planoly for Tuesday and Thursday at 9am.
That is four connectors doing four jobs in a single pass. Notion holds the thinking. Canva holds the design. Your brand file holds the voice. Planoly holds the calendar. Claude is the thing in the middle moving work between them, and you never open a tab.
None of that asks anything new of you. It just needs the roads built. Add these under Settings > Connectors.
- Canva or Figma, so Claude works from your real templates and brand kit instead of inventing a look. If you use neither, no worries, Claude Design is pretty damn good.
- Notion or Google Drive, so it can pull the briefs, docs, and copy you already keep somewhere else.
- Claude for Chrome, so it can go and look at the live web for you: a competitor’s grid, a trend that is taking off, a page you want pulled apart. Install the extension from the Chrome Web Store, then switch the Chrome connector on in your settings. This is the one most people forget, and it widens what you are able to ask for more than any of the others.
Skills: the recipes that make it repeatable
Connectors give Claude reach. Skills give it a method.
A skill is a written recipe for one specific job. It lives in your Claude folder and Claude reads it whenever that job comes up. Ask for a carousel without one and you get whatever Claude thinks a carousel is. Ask with one and you get your hook structure, your slide count, your template, your CTA, every single time. Somebody already worked out how to get an AI to nail that task, so you never have to teach it again.
There are two ways to get skills, and you will end up doing both.
Way one · import one somebody already built
The fast path. Download the file, upload it once, use it forever. Go to Settings, then Skills, then Add skill, then upload. To run it, type its name with a slash in front, or just describe what you want and Claude will reach for the right one on its own.
We have built you a starter set, free, below. Each one builds a full carousel around a hook format that reliably performs, in your brand voice, rendered against your template so the output looks like you and not like AI.
- Shock hook carousel builderYou want the scroll stopper. “Wait, it can do that now?”
- Myth flip carouselYou are calling out something your audience believes that is wrong.
- Loss story carouselThe vulnerable one. What went wrong and what it taught you.
- Superiority listicle carousel builderA ranked list with an implied comparison.
- Audience question carousel builderWhat you want back is comments and conversation.
- Result receiptYou have a specific, quantified win. Numbers beat adjectives.
Way two · build your own
Imported skills cover the common jobs. The best skills you will ever use are the ones nobody else could have written, because they encode how you work.
The trick is simple. Any time you finish a long back and forth with Claude where you finally got something just right, stop and say turn the above into a skill. All the correcting you just did, the tone notes, the format tweaks, the “no, shorter”, gets packaged into something repeatable. You paid for that lesson once. Now you never pay for it again.
Next time the task comes up, tell Claude to run it and the process starts itself. The weekly Instagram post, the monthly calendar, the investor update email, the way you caption a Reel. Eventually every manual part of your social media management should have a skill sitting behind it.
Put your skills on a schedule

This is where it stops being a tool you use and becomes something that runs. Any skill can be attached to a scheduled task. Click the schedule icon at the top of Claude, then type the description and which skill you would like it to run.